Last week I shared a picture of a needle case and a case for my glasses that I had made from sweet wrappers. I was asked if I could share how I made these and also was asked by a friend if I could make a needle case for her.
Sweet Wrapper Needle Case Tutorial

To make this you will need ...

a piece of felt/velvet, sweet wrappers, bondaweb, coloured thread
and a piece of sheer fabric the same size as the felt/velvet

Place the bondaweb, rough side down, paper side up, on top of your felt/velvet

Using a hot iron and protecting your ironing board from the sticky stuff iron over the bondaweb to glue into place

Peel the paper away leaving the glue attached to the felt/velvet

Lay the sweet wrappers on top of the glued fabric in any
design you like, it doesn't even matter if you leave a few gaps

When you have completely covered the fabric in sweet wrappers
carefully lay the sheer fabric over the top

Place a sheet of baking parchment or other non stick paper over the sheer fabric and iron to secure the sweet wrappers. The sheer fabric will stick in a few places which will help to keep it in place when you start stitching

Now you can start free machining the sheer fabric, sweet wrapper and felt/velvet layers together
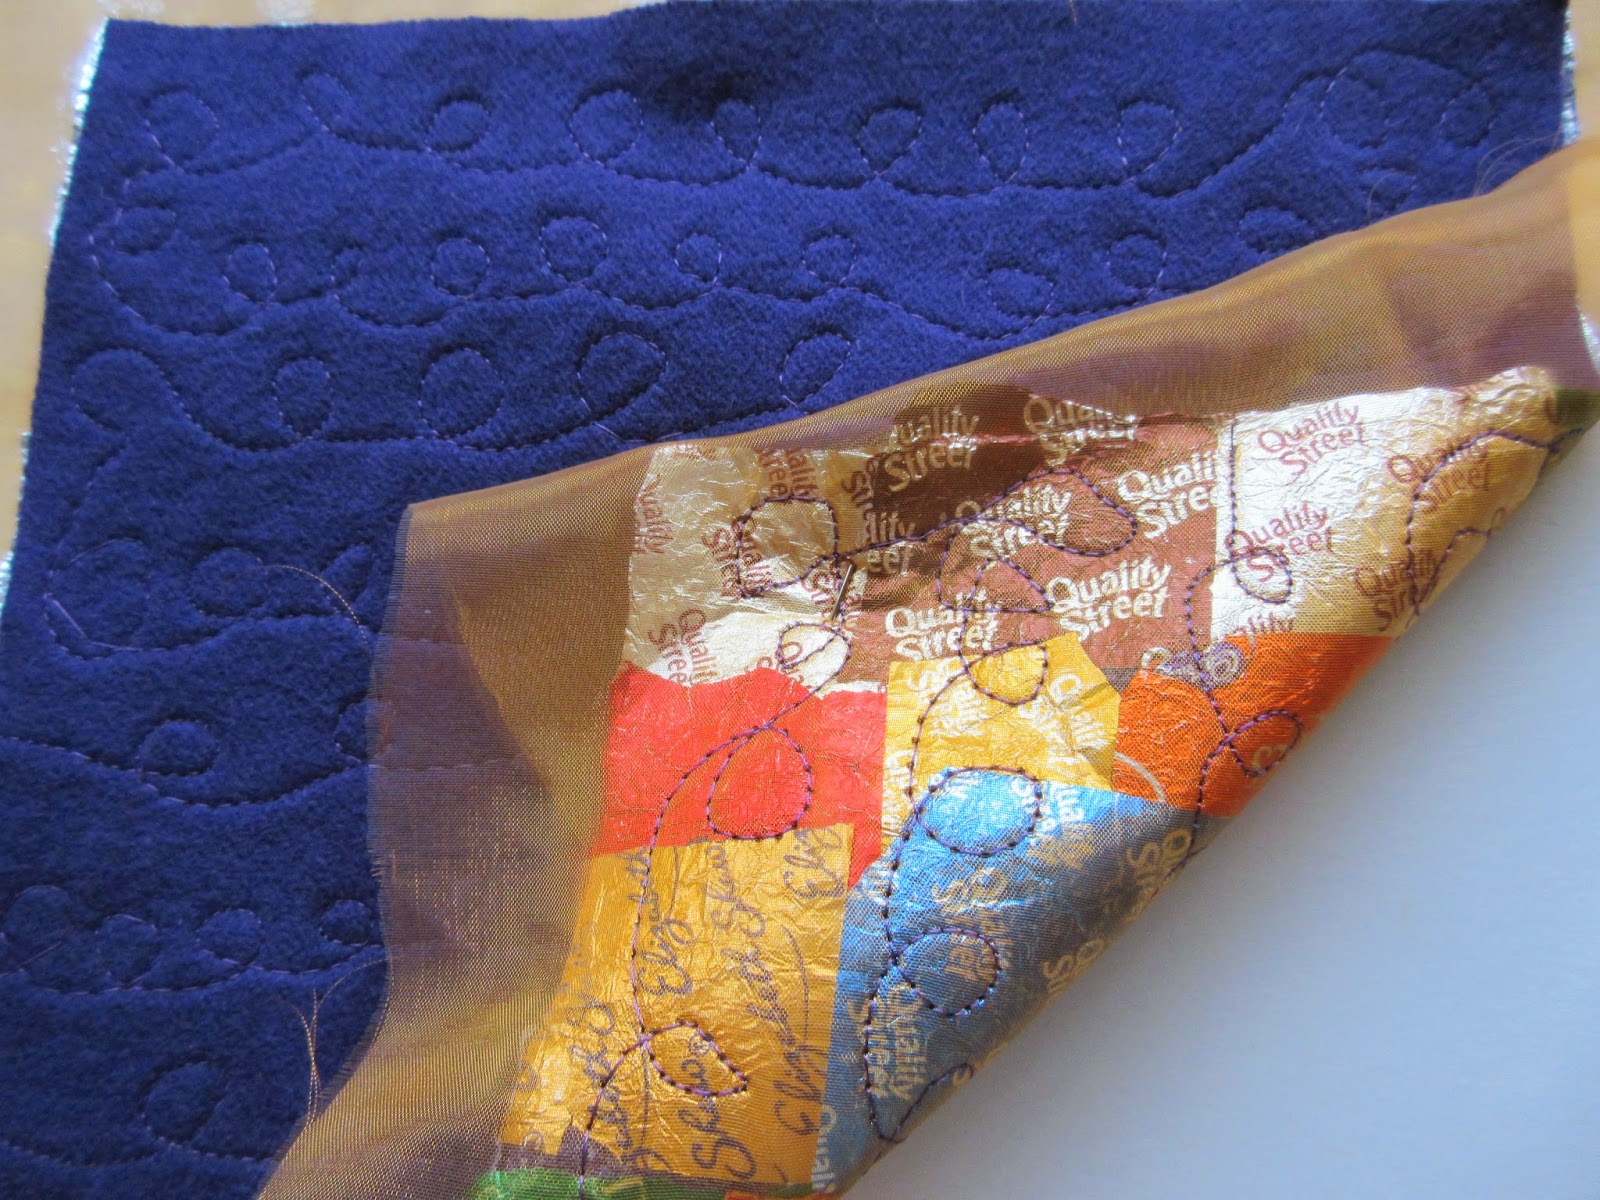
Here you can see how the stitching looks both on
the front and on the reverse

It's at this stage you need to think about what you want on the inside. My friend asked for a couple of pockets to keep threads in and a couple of 'pages' for needles. After stitching these in place you are then ready for the fun bit

Using a heat gun carefully melt back the sheer fabric. It will only burn back as far as the nearest stitching. You can see this beginning to happen in the top half of the picture above.

Here is the completed piece of sweet wrapper 'fabric'

To finish off the edges I chose to zig zag over two strands of a bright orange cord. Measure around the edge of the fabric allowing for a loop to use as a fastening later and double the measurement

Zig zag around the edge being sure to go over the cord whilst securing
it to the fabric - et voila!
Add a bright button and you have completed
the Sweet Wrapper Needle Case.
Have fun!


.jpg)
.JPG)
.JPG)